Here is the quick introduction to how to get started with the Nuke NDK. The above video tutorial is using Visual studio 2010. Below is the example plugin code with all the comments in more detail that describe how a plugin works. The video tutorial will cover the building and using procedure.
// Copyright (c) 2012 The Foundry Visionmongers Ltd. All Rights Reserved.
// Standard plug-in include files.
//Before we start here is a very good example straight from the NDK :
'''
For instance, the following occurs when you create a CheckerBoard node and views its output:
User -> Create a CheckerBoard
NUKE -> Loads and creates an instance of the CheckerBoard Op
NUKE -> Calls the knobs() function on the Op to figure out what parameters the node has
NUKE -> opens the control panel and shows the parameters for the knobs
User -> At some point the user attaches a Viewer or output node (Write) to produce an image
NUKE -> Looks for Ops that match the current Node Graph at the current context (frame number).
If none are found, new Ops are created
NUKE -> Places the values of the knobs into the Ops frozen at a given context (store)
NUKE -> The output Op asks its inputs for what channels and image sizes it produces (validate).
Each Op recursively calls its inputs asking for their image sizes and channels until there are no more inputs
NUKE -> The output Op requests a certain image size and channels from all its inputs (request).
Each Op recursively calls its inputs requesting a certain image size and channels
required to output the image requested until there are no more inputs
NUKE -> The output Op requests rows from all its inputs (engine). Each Op recursively calls
its inputs asking for rows until there are no more inputs. Each row as it flows
back down the tree to the output is modified by each Op.
'''
#include "DDImage/Iop.h"
#include "DDImage/Row.h"
#include "DDImage/Knobs.h"
#include "DDImage/DrawIop.h"
using namespace DD::Image;
static const char* const HELP =
"Write the description of your plugin here.\n\n";
class ExamplePlugin : public Iop
{
// bounding box of the final rectangle
double x, y, r, t;
public:
// Set the min and max inputs, you can change this as your requirements
int minimum_inputs() const { return 1; }
int maximum_inputs() const { return 1; }
//! Constructor. Initialize user controls to their default values.
ExamplePlugin (Node* node) : Iop (node)
{
x = y = r = t = 0;
}
virtual void knobs(Knob_Callback);
~ExamplePlugin () {}
// The first step in Nuke is to validate
void _validate(bool);
void _request(int x, int y, int r, int t, ChannelMask channels, int count);
//! This function does all the work.
void engine ( int y, int x, int r, ChannelMask channels, Row& outRow );
//! Return the name of the class.
const char* Class() const { return CLASS; }
const char* node_help() const { return HELP; }
private:
//! Information to the plug-in manager of DDNewImage/NUKE.
static const Iop::Description description;
static const char* const CLASS;
//static const char* const HELP;
};
void ExamplePlugin::knobs(Knob_Callback f)
{
// allow DrawIop to add its own knobs to handle input
//input_knobs(f);
// this knob provides controls for the position and size of our rectangle.
// It also manages the rectangular handle box in all connected viewers.
BBox_knob(f, &x, "Example");
// allow DrawIop to add its own knobs to handle output
// output_knobs(f);
}
/*! This is a function that creates an instance of the operator, and is
needed for the Iop::Description to work.
*/
static Iop* ExamplePluginCreate(Node* node)
{
return new ExamplePlugin(node);
}
/*! The Iop::Description is how NUKE knows what the name of the operator is,
how to create one, and the menu item to show the user. The menu item may be
0 if you do not want the operator to be visible.
*/
const Iop::Description ExamplePlugin::description ( CLASS, "Examples/ExamplePlugin",
ExamplePluginCreate );
// No matter what the name of the class is , the below is the actual name of the plugin inside Nuke.
const char* const ExamplePlugin::CLASS = "ExamplePlugin";
//const char* const ExamplePlugin::HELP = "Example Plugin";
/*Essentially, the _validate function tells NUKE about the size and format of the generated images,
including the image channels we’re going to access and create. In this example, copy_info()
is called, which takes the format information from the input image and copies it onto the format
of the current “Basic” node.The set_out_channels(Mask_All); call simply says that we are looking
at (and modifying) all channels in the image. The Mask_All could be replaced by Mask_Red or Mask_Alpha
if we just wanted to look at the red or alpha image channels respectively. */
void ExamplePlugin::_validate(bool for_real)
{
copy_info(0); // copy bbox channels etc from input0, which will validate it.
// the below merge info will get the channels from input1 and merge with input0
merge_info(1);
info_.channels(Mask_RGB);
}
/*The in_channels function is required by the parent PixelIop class and tells NUKE
what channels of the image we would like to access. In general, we would like all channels,
and so leave ChannelSet& mask untouched. If we wanted, we could restrict the
channels being operated on, for example, if we only desired the red channel: mask &= Mask_Red;. */
void ExamplePlugin::_request(int x, int y, int r, int t, ChannelMask channels, int count)
{
// for this example, we're only interested in the RGB channels
input(0)->request( x, y, r, t, ChannelMask(Mask_RGB), count );
input(1)->request( x, y, r, t, channels, count );
}
/*! For each line in the area passed to request(), this will be called. It must
calculate the image data for a region at vertical position y, and between
horizontal positions x and r, and write it to the passed row
structure. Usually this works by asking the input for data, and modifying
it.
*/
/*Notice that the class Row is used a lot in this function. This is because NUKE likes
to operate on scanline rows of images at a time. This makes sense for many reasons,
such as operating on different scanlines in parallel (multiple threads) or, more importantly,
only needing to keep a handful of image rows in memory at any given time. The row index you
are currently working on is given by y, with the offset into the scanline given by x.
Note that either or both of these can be negative (for example, if the input image is
outside the bounds of the frame rectangle). The last index of the scanline is given by r,
and the width of the input scanline is therefore given by r-x-1. The channels that you have
access to are set in the channels. As you can see from the code, in[z]+x and out.writable(z)+x
give you pointers to the input and output row data for channel z, where z is obtained using the
foreach function to iterate over the collection of channels passed in. The output pointer can
obviously then be accessed to do what ever you’d like. */
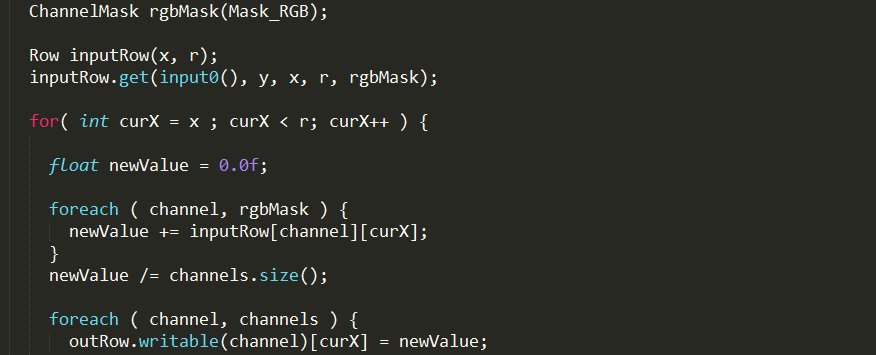
void ExamplePlugin::engine ( int y, int x, int r,
ChannelMask channels, Row& outRow )
{
// Remember that this function is being called for every row and is being
// parallel executed by the threads
// for this example, create a simple greyscale output from RGB channels
ChannelMask rgbMask(Mask_RGB);
Row inputRow(x, r);
inputRow.get(input0(), y, x, r, rgbMask);
for( int curX = x ; curX < r; curX++ ) {
float newValue = 0.0f;
foreach ( channel, rgbMask ) {
newValue += inputRow[channel][curX];
}
newValue /= channels.size();
foreach ( channel, channels ) {
outRow.writable(channel)[curX] = newValue;
}
}
}
Hi there! I know its a long time, since you posted this, but It would be really great to have a little Visual Studio tutorial, that covers how to set things up to get this into Nuke (using the ExamplePlugin that comes with Nuke maybe?). It would probably be the first video ever made on that topic. : )
Hi Johannes,
Good idea ! Will try to do it this weekend and post it on youtube.
Thanks !
Hi Johannes,
I finally have the tutorial completed https://youtu.be/JsQeeOJKQDc , hope this helps !
Hi,
Is the video tutorial out allready? I couldn’t it.. If not, maybe you can find the time time to create one.. I couldn’t find anything on this topic. I really new to C++ and writing plugins, however I’m currently writing on my master thesis which apparently includes creating a plugin for nuke. (no other way to solve the problem…)
Hey Dom,
I just created the Nuke tutorial and here is the link to it https://youtu.be/JsQeeOJKQDc , let me know if you have any questions. And I hope this helps !
Hi. Vivek
Do you know how nuke plugin license part works? Because I tried this “https://docs.thefoundry.co.uk/nuke/63/ndkreference/Plugins/structDD_1_1Image_1_1License.html?_ga=2.167796329.955848363.1516330029-775375111.1511599379”. But its not working.